For posterior, back, teeth – dental porcelain onlays and crowns are often done where much tooth structure is missing. When porcelain is selected it is because the appearance is of paramount importance – otherwise it is avoided because of the abrasion it causes and the relatively poor fit at the margins.
I use here the term “porcelain” – while there are other ceramics in use in dentistry than porcelain – including Zirconia and Lithium Disilicate. ALL of these are abrasive, however – but they vary in their appearance characteristics. Zirconia crowns were originally market as “BruxZir” (TM) crowns to suggest they are better used for bruxists (those who grind their teeth) – but they are NOT marketed as less abrasive! It’s all in the name….
There is a rather detailed description of the onlay restoration in Wikipedia, which is well referenced – for those desiring more details.
Organization of this Chapter
You May Skip to Whatever Subject Interests You Now
General Considerations for Porcelain Restorations
The Porcelain Onlay
Porcelain Posterior Full Crowns
Porcelain Anterior Full Crowns
General Issues
Preparing the Anterior Tooth
Facial Margin Placement and Form
Axial Reduction and Taper
Cementation of Porcelain Crowns and Onlays
How are Porcelain Crowns and Onlays Made?
Method I
Method II
Why has CAD/CAM become so Popular with Dentists and Patients?
Bottom Line for Porcelain Crowns and Onlays
…………………………………………………………………………………………………………………………….
Dental Porcelain Onlays and Crowns: General Considerations for Porcelain Restorations
The porcelain onlay and porcelain crowns are designed to accomplish exactly the same purpose as the gold equivalents, at least as far as posterior teeth are concerned. But there are significant differences.
Of course the color is different – porcelain is carefully fabricated to look as much like the surrounding tooth structure as possible. Of course if you took a gold crown and hung it on your earlobe, it would be fine, but gold reflections visible in the mouth are not desired in the U.S. culture.
There are several more critical differences. First, porcelain is much weaker than gold, that is to say it is brittle and can break, where gold cannot. Gold can distort or bend, so it has to be a certain thickness, but this is far thinner than required for porcelain not to break. So the tooth must be reduced more for a porcelain crown than for a gold crown – both on the occlusal surface and on the outside, axial walls.
Second, porcelain is very abrasive – consider that it is essentially glass with a lot of particles suspended within. When the glass between the particles on the surface wears out, the particles are exposed – and we have sandpaper!
Third, however the porcelain crown is made, it cannot be made with the margins anywhere near as well adapted as we have for gold – so the chance of decay recurring at these margins is far higher.
Fourth, the mechanical retention methods that we used for gold would put too much stress on the porcelain, so it is not retained by having sharp angles, boxes, grooves and conservative tapers as are gold crowns. Porcelain must be retained by ADHESIVE BONDING. This was not possible until the development of composite adhesive technology in the 80s, so successful porcelain crowns were not possible prior to that. And this turns out to be one of the big problems with porcelain crowns: most dentists use an abbreviated version of the technology that is available for cementation adhesively, to save time, and crowns often fall off!
The Porcelain Onlay
The drawing below shows a basic design for a porcelain onlay tooth preparation. Note that the boxes are drawn to be more divergent toward the occlusal than we saw for the gold onlay (Chapter V.6).
Also, for the porcelain onlay the internal form is kept ROUNDED. If there are any sharp corners anywhere it will cause stresses on the porcelain, increasing the likelihood of fracture.
As was discussed before, the occlusal surface of the tooth must be reduced MORE than for gold, so that the porcelain is thicker and stronger as well.
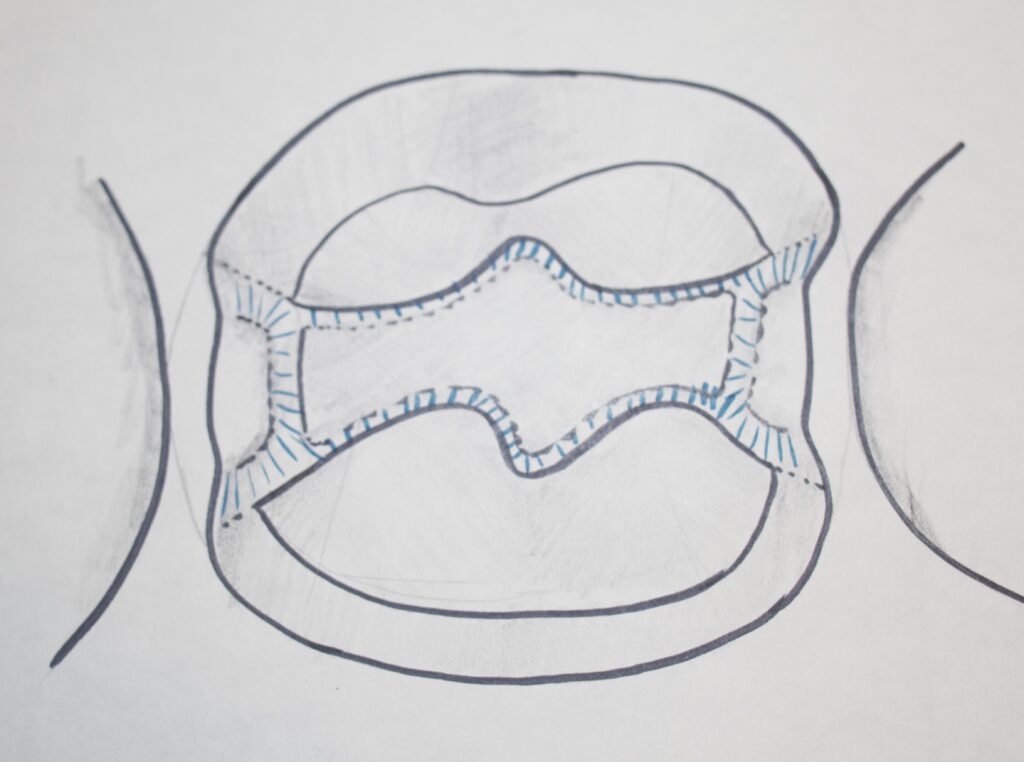
It is notable that for the porcelain onlay, as it is cemented to the prepared tooth, ALL of margins are in enamel! This means that when we DO use adhesive cements, there will probably be a stronger bond to the tooth at these margins than would be expected at dentin margins. This is assuming that the dentist uses a cementation technique that is not as effective at dentin bonding. As stated before, many dentists use a short-cut cementation technique that does NOT bond to dentin well. This makes the onlay, with enamel margins, a more favorable preparation method.
I know something about porcelain falling off from my own personal experience, in that I have had two porcelain onlays in my mouth over the years. One of them fell off after a week and was replaced only to get decay under an open margin a couple years later. It was replaced by a gold crown. The other stayed on for about 5 years before falling off, and has been recemented using all of the technology available. We’ll see how long it lasts now. But I’ve never had a crown retained by mechanical means need replacement.
NOTE that these were porcelain onlays in this case, which should stay in place BETTER!
Porcelain Posterior Full Crowns
Posterior full porcelain or full ceramic crowns are also common, in fact more common than porcelain onlays.
The relation to the onlay is just as it was for the gold onlay versus crown. In the all-ceramic full crown, the ceramic covers the occlusal surface, and comes down all sides to near the gumline. This full crown restoration suffers from the same disadvantages as the onlay, but is done generally because there is no tooth structure healthy enough to save, or the dentist is more comfortable doing a full crown preparation than an onlay. There are practical reasons why the onlay may be a BETTER restoration, as we just saw – the enamel margins.
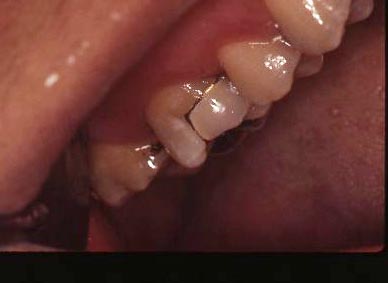
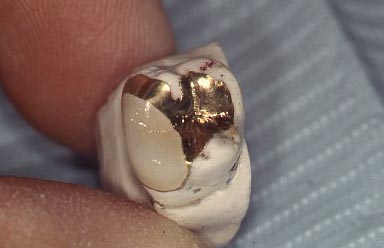
Just to remind you that porcelain and metal are not mutually exclusive. The photographs below show a GOLD INLAY with porcelain covering a visible cusp.
Anterior Porcelain Crowns
General Issues
For anterior, front, teeth there are no real alternatives to porcelain crowns. At least the surface of the tooth that is visible has to be covered with porcelain. As we will see in the next chapter, one CAN make a porcelain crown that is strengthened and supported by a metal substructure. Here we are just talking about All-Porcelain crowns.
When a front tooth needs significant restoration, it is for one of two different reasons: 1. The tooth has been damaged and repaired, and decayed to the point where there is little sound tooth structure left, so it is better to just cover everything over; and 2. The patient thinks they will look a lot better if they have “new” teeth in the front – i.e. strictly cosmetic concerns.
As we’ve discussed before in chapters dealing with esthetics, there are a number of factors that need attention before a crown can be done that IS esthetically acceptable. What that means, is that nobody can tell that you have a crown on that tooth – the match to the other teeth is so good. It is ALL about how the tooth looks compared to the others, whether the reason for doing it is restorative or cosmetic.
But the amount of detail that it requires to make a truly natural anterior crown is impressive and daunting. And most dentists don’t take into adequate account one of the most challenging aspects to this esthetic match – the translucency of the porcelain compared to the natural teeth that abut it.
Recall from previous discussions that as the teeth age, corresponding to when WE age, the enamel turns more transparent, revealing the color of the dentin, which is a straw-color. This “yellowing” with age is due to light penetrating through the enamel, being partially absorbed by the dentin, and coming back out shifted in color accordingly. This penetration of light into the ENAMEL must be duplicated in the PORCELAIN, or the crown won’t look natural, even if the shade seems about the same.
When the laboratory technician knows the age of the patient and the dentist gives an approximate shade based on standard color tabs, the technician can get close, but cannot be sure. So both the technician and the dentist have to be very familiar with the transparencies of whatever porcelain formulations are available.
And – in order for there to be ANY CHANCE to get a crown where the light penetrates the porcelain naturally, there must be ENOUGH porcelain. There cannot be enough porcelain if there is NOT enough tooth reduction.
As the dentist prepares the front tooth for a crown, he must reduce the incisal edge, and especially facial surface so the technician can add enough porcelain to be esthetically natural. This must be done without having to increase the bulk of the crown past the contours of the original tooth.
Both the appearance of the porcelain and the contours of the porcelain are critical in determining how the final crown will look in the patient’s mouth – that is whether it looks like a crown or another tooth.
Preparing an Anterior Tooth for an All-Porcelain Crown
Whatever may be wrong with the anterior tooth, presuming it is not just a cosmetic crown, the reduction of the facial surface has to be done appropriately. That means that from the gingival margin of the crown, actually UNDER the gumline, to the incisal edge, the dentist cuts enough tooth structure so that it can be replaced with enough porcelain to be strong and look natural, while not being overcontoured.
I frequently tell my students that if the dentist under-reduces the facial surface of the tooth, the lab technician will call and may suggest that there are only two ways to make the crown, ugly and ugly. Either it is ugly because the porcelain is too thin and the light doesn’t penetrate naturally, or it is ugly because it is bulked out to make the porcelain thicker, and it doesn’t have the same contour as the nearby teeth as seen from the side.
The dentist must have a thought to WHERE the facial surface of the final porcelain crown will be relative to where it was originally – it may be in a different place because the tooth lies BEHIND the adjacent teeth, and it would look better to build it to fit in the arch.
Facial Margin Placement and Form
Also, the dentist needs to place the margin of the crown, where the crown stops and the natural tooth structure starts, UNDER the gumline on the facial side. In fact, the dentist will attempt to place this margin as far under the gumline as possible. This is done because when this margin is hidden beneath the free gingival tissue, it cannot be seen – at least not for some years. The problem is that if the margin is not really well adapted to the tooth, the gap at the margin will allow bacteria (plaque) to accumulate, which will cause gingival inflammation, and eventual recession, where the margin will show more quickly. Another problem is that the farther below the gingiva the margin is placed, the more difficult it is for the dentist to get a good impression of this area. Without a good impression, if the technician is willing to make the crown, it will likely have an even more poorly adapted margin than usual, with concomitant faster recession.
Also, the dentist needs to be very careful about the FORM of the marginal area on the facial side. Since the porcelain needs a certain thickness, most desirably 1 mm in that area, the dentist makes a little shoulder in that area that will allow that thickness. The SHOULDER is angled somewhat gingivally (downward) – like a little ramp between the wall of the prepared tooth and the margin. This angled shoulder is needed because it provides more of a “sliding fit” of the porcelain to the margin, BUT it is also critical because IF there is any enamel left at the margin, were the shoulder to be horizontal, the enamel would be undermined and flake off!
This issue of enamel flaking off at margins is something worth paying attention to – mostly because many dentists are careless about this. In dental school we are all taught to angle the shoulder on any ceramic preparations, but if the reason is unclear, the ACT will be neglected eventually. Even the more aware dentist may figure that the adhesive cements he is using for an all-porcelain crown will hold any undermined enamel in place – but this is not true forever, if at all.
I have worked with many students who wanted to cement crowns on anterior teeth for their patients and, upon close inspection, noticed that the enamel in certain areas at the margins of the tooth preparation was chipping off – leaving an open margin, subject to more decay. The faculty member who had approved the preparation was not careful enough, so I get the mean looks when I make the student start all over again.
Axial Reduction and Taper
While the facial reduction is critical to the success of the crown esthetically and in terms of longevity, the INCISAL reduction is also important, because the technician must place some fairly transparent porcelain there, and enough of it to look natural.
The reduction of the rest of the tooth, all around from facial to lingual and through the contact areas with the adjacent teeth, must be adequate for a bulk of porcelain that is strong and unlikely to fracture. In general 1 to 1 1/2 mm porcelain is adequate in these areas. Basically, the facial shoulder is taken all the way around the tooth.
One other aspect of the full ceramic crown, which we saw for the porcelain onlay as well, is that there should be NO SHARP CORNERS. Sharp corners will generate stress in the porcelain, potentially causing it to break.
This is similar to the consideration that for porcelain crowns the TAPER should be MORE than for gold crowns. The more parallel the sides, the more stress will be applied to the brittle porcelain restoration.
Dental Porcelain Onlays and Crowns: Cementation
Here things get really interesting. As I have said, the cementation technology that was developed during the 80s has lead to the possibility of doing all porcelain crowns or all ceramic crowns and onlays. But, cementation techniques that are available that work the most reliably are not always the techniques that are used!
And the problem lies in the fact that there is NOTHING mechanical that is holding the crown in place, because if there were it would generate stress in the ceramic from occlusal forces, that would tend to break the crown.
Dentists generally want things to be simple, because simple usually means faster. But, sometimes simple means compromise.
The compromise with the cementation process has to do with the fact that to cement a totally INORGANIC material (porcelain) to a mostly ORGANIC material is challenging! What glue would YOU use to glue a chicken bone to a glass?!
This was discussed in Chapter V.4 – on adhesive dentistry – but will be covered here to some extent as well, as it is most applicable here.
The technology actually originated with the processes developed to make bullet-proof glass, and shatter-proof glass for cars. One glues two dissimilar substances together by using an intermediary, or LINKING material that likes both surfaces.
First – the porcelain surface must be prepared – it is etched with hydrofluoric acid – a weak acid that is dangerous to get on the skin because it penetrates through the skin and burns from the inside! Not pleasant. In any event the dentist will etch the porcelain surface – making a VERY active inorganic surface with silicon and oxygen atoms.
Second – the dentist will treat the surface of the porcelain with a coupling agent. The coupling agent is only effective in increasing the adhesion to the PORCELAIN.
Third – the dentist must be sure to adhesively bond to the tooth structure as well!
THIS is critically important! If the restoration is a porcelain ONLAY, the surface of the tooth at the margins of the crown all the way around are in ENAMEL! If the restoration is a porcelain full CROWN, then the margins are typically all in DENTIN (except maybe a couple of places of enamel at the shoulder margin for anterior teeth)!
Adhesive dentistry always works better to enamel than to dentin. The bond is always better to enamel because of the much higher level of mineralized tissue, to which the cement connects best. THEN – for a porcelain onlay, we expect better adhesion than for a porcelain full crown!
How do I know this? It was actually not taught in school – I learned it from my patients, and in particular, from my OWN mouth!
I had a porcelain onlay that stayed in for several years just fine, but when the tooth was prepared for a full gold crown OVER the porcelain onlay, the enamel margins were eliminated, and the rest of the porcelain fell off the tooth because it was NOT bonded to the dentin. It is only the onlay preparation that has ANY enamel to bond to!
That being said, we CAN get good bonding to dentin. It involves etching the dentin just as we etch enamel (with a different acid from what we used for the porcelain) and then treating the etched dentin with a dentin PRIMER. This material soaks into the more porous dentin and will polymerize there when the cementation is done, creating a well bonded layer. Sounds good, but a lot of dentists don’t do this step when cementing porcelain crowns, they just use a “one-step” cement, reasonably adhesive to enamel, but not so much to dentin.
Now – once the porcelain and tooth surfaces have been etched and primed appropriately, the crown can be cemented to the tooth with a cement that bonds well to BOTH the treated porcelain and treated dentin/enamel surfaces.
Dental Porcelain Onlays and Crowns: How are they made?
There are TWO completely different methods. And the difference between them illustrates some of the forces that have disturbed the profession of dentistry over the years.
Method I
Method I is to have the laboratory technician make the crown. He/she will make a die just as for the cast gold restorations, but upon that die he/she will take a soft muddy blend of porcelain ingredients and build the crown out of this in layers, firing at very high temperature each layer to make the glassy finished product. This is called STACKING THE PORCELAIN. The technician will hand-stack the porcelain.
Considering the level of control that is possible for building the crown in this way, I will generally refer to this method as “handcrafted” porcelain crowns. If I were to start a practice again, I would advertise that I specialize in handcrafted crowns, in order to distinguish what I do from what is done with method II below.
When the porcelain is stacked by a technician, they can adjust and vary the shades and transparencies in every area to exactly duplicate the appearance of the surrounding natural teeth. This is provided that the dentist communicates well with the technician what is needed. There can even be scribed into the surface thin dark lines that simulate the appearance of cracks that many older people get in their teeth.
Clearly the best esthetics for an older person is achieved with ample reduction of the tooth surface by the dentist, and an artistic rendition of the tooth appearance by the technician.
Method II
Method II is the result of the development and elaboration of digital technology. It represents a truly remarkable achievement in technology, in several areas. First, the impression of the prepared tooth is NOT done using impression materials, but using a 3D camera – and then the digital impression goes directly into a computer. The software has information about the opposing and adjacent tooth surface locations, and the dentist can adjust the “virtual contacts” with these other teeth on the computer! If the system is well calibrated, the resulting crown actually fits against these other teeth very well!
Once the digital impression is taken and the crown is designed with the 3D software in the chairside computer, the information is sent into the next room where a MILLING MACHINE is used to cut the crown from a block of poreclain! Again, phenomenal technology!
The porcelain crown as cut from a solid block is removed from the milling machine, polished, painted with some glaze, which may provide some color variation, and then tried into the patient’s mouth. If the fit is good, then it can be cemented in using various techniques described above, comprehensive or abbreviated.
This CAD/CAM – computer aided design, computer aided manufacturer – technology has revolutionized crown and bridge dentistry forever. More on this subject may be found in Chapter VII.4, which discusses several forms of high-technology that have contributed to dentistry.
Why has CAD/CAM become so popular with patients and dentists?
The first reason that it became so popular with dentists is that they could produce the crown at the preparation appointment, and no other appointment is necessary – crowns in one appointment! I’ve had two of these done and that is an attractive prospect, especially for very busy patients.
The second reason it became popular is that the dentist can save on the fees charged by the laboratory – making more profit from each crown.
But – let’s look at the financial picture a little more carefully. The amount of money that is saved for each crown done by CAD/CAM may be $100 – the lab fee minus the cost of the block and supplies for the milling machine. The COST, however, of HAVING the system in the office might well run $4000 per month. SO – the dentist must do 40 crowns using the machine each month just to not LOSE money!
What that means for the average dental practice, where 40 crowns a month is a good month, is that NO crowns can be done any other way! Gold crowns will not be made, nor will any crowns that involve both porcelain and metal.
Do the crowns made by the CAD/CAM system rival the appearance and esthetics of handcrafted crowns? Sometimes, especially for younger patients. But for older patients with translucency issues and variations in shade, it is much harder to come up with something acceptable. I sometimes wonder about the extra time that the dentist has to put into this service, adjusting shades, glazing, etc – and if anyone considers this to cut down on the profit.
It IS a pretty powerful advertising strategy to offer crowns in one visit – BUT that was more powerful when fewer dentists had the systems.
AND – most dentists don’t realize that if they use an abbreviated cementation method it will only be the ONLAY that is retained well (for reasons discussed above). For anterior full ceramic crowns to stay on well with the additional taper required, we do our best for our patients to use the full technology available to us for cementation, with the additional time required.
This latter point, however, is true whether the porcelain onlay or crown is made by hand or by CAD/CAM.
Bottom Line for Dental Porcelain Onlays and Crowns
This chapter illustrates another instance in modern dentistry where the trade-offs and compromises that we have available to us must be considered carefully, for the long-term service we are providing to our patients depends on it!
But, of course, for ANY restoration of anterior teeth, we must consider porcelain as the most esthetic material to use.
Later, in Chapter V.18, where Cosmetic Dentistry is discussed in more detail, porcelain veneers are described. Veneers are FAR more conservative procedures for the anterior teeth, as they just replace most of the enamel on the facial surface and incisal edge.
But – other than for strictly cosmetic purposes – full porcelain crowns and porcelain onlays have a great and important role to play in dental restoration.